
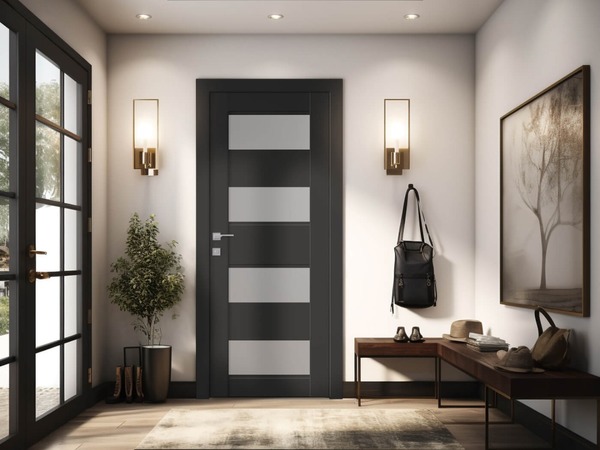
In our article, we'll show you how to choose the perfect handle for your door, explain the installation process and share some useful tips.
Replacing a doorknob is a straightforward process. All you need is a set of new door handles, which you can get from any hardware store, and a simple screwdriver. It's really straightforward to change a handle – it doesn't require any special skills. Give your door a stylish upgrade in no time with our simple tips!
Tools and materials needed to change the door handle:
- Screwdriver.
- Make a new set of door handles.
- Prepare a measuring tape.
- Record important dimensions and data on paper. This list will help you get organised and make sure you have everything you need.
To replace the door handle:
- Release the handle.
- Remove the decorations and fasteners on the inside of the door.
- Decide on the right handle for your door.
- Install new latches and fixings.
- Fit the new plates.
- Fasten the new handle in place.
Stage one: Removing the installed door handle
Step 1: Locking the door in the open position
Open the door halfway to access the handles. Put a spacer or door block under the door to stop it moving or closing during the handle removal. This makes sure the door is safe and stable.
If you don't have a special door retainer, any wedge-shaped object will do.
Step 2: To remove the handle, use a screwdriver to release the pressure relief mechanism
Take a look at the handle. You should see a narrow slot on the side or end where it connects to the base. Just pop a flat-bladed screwdriver into it and press gently but firmly to get the mechanism going, then take out the handle.
Plates that are round or rectangular and are fixed to the door between the handle and the leaf not only disguise the mechanism, but also make the door look better. If you don't spot a special removal groove, just carefully remove the handle. Depending on the design, there might be different ways to remove the handle.
If you can't seem to separate the handle from the door, it might not be designed to do so. Take, for instance, a handle with a rectangular base that's integrated with a plate. If you can't get the handle off, just remove the whole plate instead.
Step 3: Remove the door handle guards
Just use a flat blade screwdriver to loosen and remove the screws on either side of the door, if there are any. Use the edge of the tool to gently pry up the edges of the plates and carefully release them. Once you've got the elements free, just remove them and set them aside. Some covers don't need screws and can be removed straight away. To do this, find a small recess on the side or bottom where you can put a screwdriver to get the protection off. Some round elements on the doors are threaded, so if you can't remove them the usual way, try turning them anticlockwise to unscrew them.
Step 4: Next, just unscrew the screws that are holding the locking bracket and the plates on the inside of the door
These bits are fixed with screws on both sides, so you'll need to remove them to take the thing apart.
You'll find the inner panels underneath the covers you just removed. They support the mechanism that activates the door handle and are placed in a special recess in the door leaf. The door lock is a metal profile with an angled profile that can move back and forth within the edge of the door. It holds the door frame open so that the door stays shut. Just turn the handle and the lock will come out, allowing you to open the door.
Step 5: Taking the lock apart
Carefully take out the keyhole and the lock through the hole on the inside of the door and put them to one side. Then, take off the decorative covers on both sides of the door and put them to one side. You'll now be able to see the empty holes where you'll be mounting the new door handle.
Stage two: Installing the new door handle
Step 1: To fit a new handle to your door, you must first take measurements
Measure the length from the door leaf to the centre of the mounting hole. This is the size of the back lock. Choose a model that matches this. Choose a similar handle to the old one so that the new hardware covers any marks from the old one.
The distance between the door handle mounts is usually 60 or 70 mm, making it easier to fit the new handle. If your previous handle had square plates, choose a new handle with the same type of plates. Don't switch to handles with round elements.
Step 2: Install the new locking mechanism in the special recess on the inside of the door leaf
Orient the mechanism so that the corner faces the direction the door closes. Push the locking element in until it is flush with the door.
Door handle locks come in standard sizes, so it's easy to fit new hardware into an existing hole. If the dimensions are wrong, use a chisel to correct them. Next, put the new handle on the door. Align the holes and secure with the screws and screwdriver.
If you get new plates for the inside and outside of the door, follow the instructions to put them in the right place. Next, put the decorative plates on top. They should fit when you press them in. Then fix them with screws and a screwdriver.
Step 3: Install the new door handles and press them firmly until they click into place
First, fit the outer handle to the outside of the door, then the inner handle to the inside. The trim plates on both sides of the door should be the same. They just look like they conceal the mechanism.
Step 4: Install the decorative panels on the inside of the door
Press them down firmly until they click into place. Then use a screwdriver to fix the panels with the screws. The decorative panels fit both sides. They are universal and only cover the main plates.
Step 5: Fit the outer part of the door handle to the mechanism on the outside of the door
Make sure it clicks into place. Do the same for the inside handle. If the cylinders are threaded, the handles must be screwed in, not just snapped in.
Step 6: To make sure the door locks and handles match, choose and install new parts
Remove the old hardware by unscrewing the fasteners. Then, install the locks and latches carefully, using the screws. This will make the door look better and work better.
You only need to replace the rest of the hardware if the new door handle doesn't match the rest. If you have a silver lock and replace the old handle with a similar colour, the contrast is usually not noticeable. If you have a gold-coloured handle, you may need to match the lock.
Recommendations for personal safety:
- Don't forget eye protection if the situation calls for it.
- Pay attention when handling tools, particularly screwdrivers.
FAQ
1. Can I replace a door handle myself?
Yes, it’s a straightforward task requiring basic tools and minimal experience.
2. Do all door handles fit all doors?
No, you must match the backset, handle type, and function (privacy, passage, etc.).
3. What if my door handle doesn’t have visible screws?
Hidden screws are usually under a decorative plate—pry carefully with a flathead screwdriver.