
Today, we're going to start with the basics – doors and trim. Over time, old trim will fade and wear out, reminding us that it's time for an upgrade. In this article, we'll show you how to give your doors, trim, and framing a fresh new look. The replacement of frames and doors is not only a necessity, but also an opportunity to update the appearance of one's home. The article will also cover the intricacies of the process and share the secrets to sealing the edges. We invite you to join us in this endeavor, as the information provided is sure to be of great use.
Preparing
Necessary tools:
- A screwdriver
- A pair of safety goggles
- Crowbar
- Spirit level
- Chisel
- Screws
- Hacksaw
- Hammer
- Nails
- Sealant
- A new door frame kit
Parts of a Door Frame
Type of Interior Door Finishes
Stage one. Removing the door, trim and frame: systematic guide
Step 1: Remove the door from the frame
The first thing to do is get rid of the door itself so you can easily access the trim and frame. To do this, just open the door and pry open the hinge cover with a screwdriver or special tool. Then you need to remove the hinge pins, making sure you support the door so it doesn't fall off. If the pins are stuck, you can knock them out with a hammer through the eyelet from bottom to top, or use WD-40 lubricant to make the process easier.
Step 2: Cut the sealant between the wall and the paneling
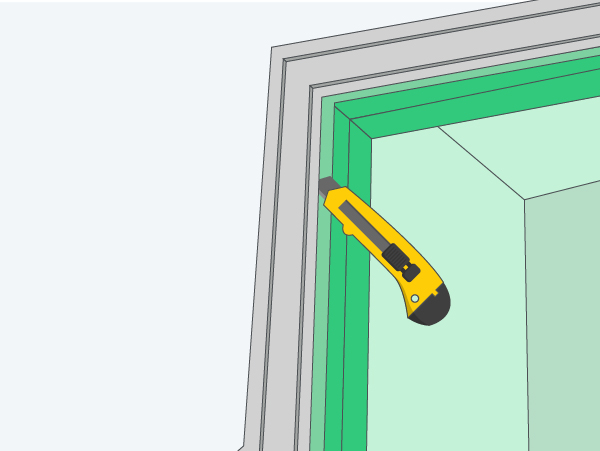
The next thing to do is to remove the sealant, which is often used to seal the space between the wall and the frame panelling. You'll need a sharp knife or blade to cut through the sealant. Just run it along the whole frame, carefully cutting the material to the depth of the connection with the wall, so you don't damage the latter.
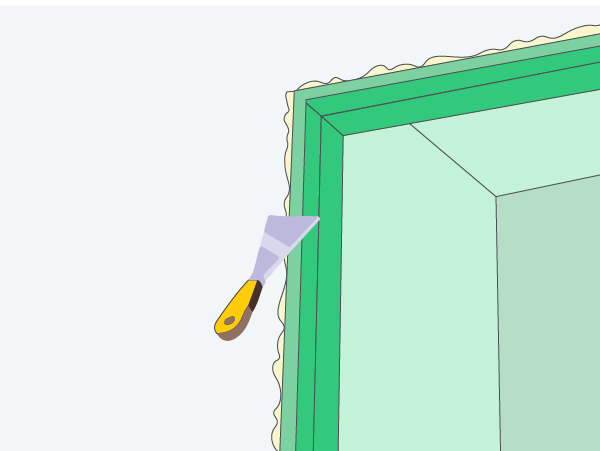
Step 3: Remove the old finish from the wall
If we're talking about interior work, it's not unusual to find a finish in the form of wallpaper or panels around the door frame. Just make sure you take these off carefully. Just a heads-up: try not to damage the base of the wall, as this will make future repairs easier. You can make wallpaper removal easier by pre-moistening it with water.
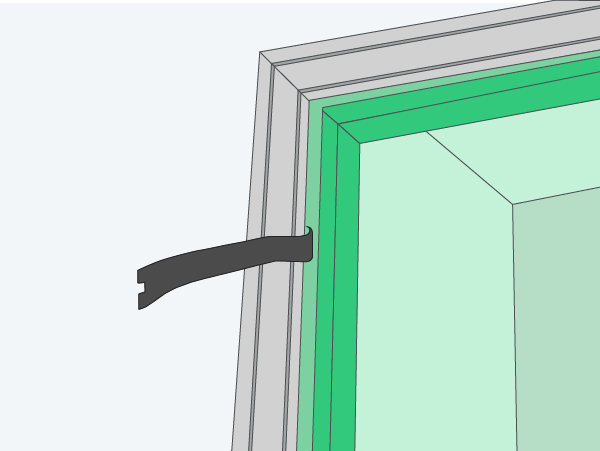
Step 4: Remove the door jamb
Next, you'll need to start removing the jamb itself. These vertical and horizontal framing members cover the end of the wall and serve as support elements for the door's attachment. You can use a chisel or an assembly spatula to get the process started. You'll want to gradually undermine the jamb so that you don't break it apart if you plan to reuse it.
Step 5: Remove any nails left in the wall
Once you've taken apart the jamb, the last thing to do is remove all the metal pieces that are left. You'll need to pull out the nails with a pair of pliers or a special tool, like a nailer. If the nail doesn't come out easily, you can carefully tap it out with a chisel or knock it out if it's already loose.
Removing doors and panelling is a process that requires a bit of care and some know-how. But if you follow these steps, you can avoid damaging the wall too much and keep the jambs in good shape for next time.
It's important to remember to wear protective gloves and goggles when using tools.
Stage two. Replacing the frame, door, and paneling
Replacing a door can seem like a daunting task at first, but with the right approach and following the instructions exactly, you can update the look and improve the energy efficiency of your home. So, let's get started on replacing the frame, door, and trim.
Step 1: place the new door, frame into the opening, and secure them in place
The first thing to do is get ready for installing the new door. Take the old door and frame off and give the opening a good clean, removing any remaining materials. Next, you'll want to install the new frame. Make sure the frame is the right size for the opening, with a bit of space to make any adjustments.
Then just pop the frame in the opening and hold it in place with wedges or spacers until you're ready to fix it in place. Make sure the frame is level both vertically and horizontally. It's important to make sure the door opens and closes easily without getting stuck.
Step 2: Align the holes so that the door stands upright
Use a construction level to make sure the door frame is in the right place. If there are any issues, you can adjust the position of the frame using extra wedges or adjusting screws (if provided by the design). It's important that the frame is absolutely vertical on both sides.
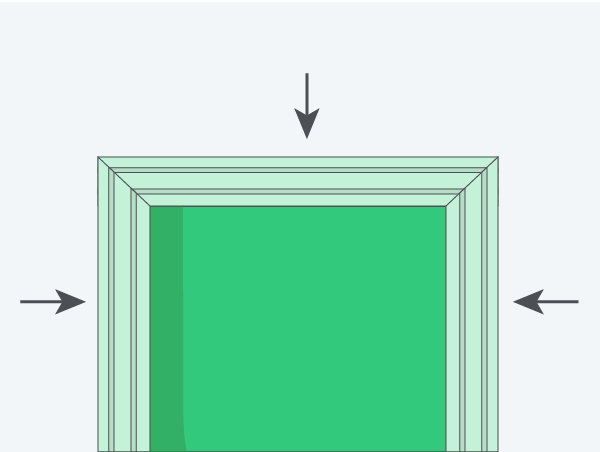
Step 3: Insulate the gap between the frame and the wall
This is an important step. You need to fill the gap between the wall and the frame with insulation to stop draughts and heat loss from the room. You can use polyurethane foam sealant or mineral wool for this. Once you've done that, wait for it to dry completely before moving on to the next step.
Step 4: Replace the panelling

The next step is to replace the panelling. Cladding is an interior and exterior element that protects the walls from the weather outside and gives your home a neat look from the outside. Choose a cladding material that blends with the overall style of your home.
Step 5: Seal the edges of the trim
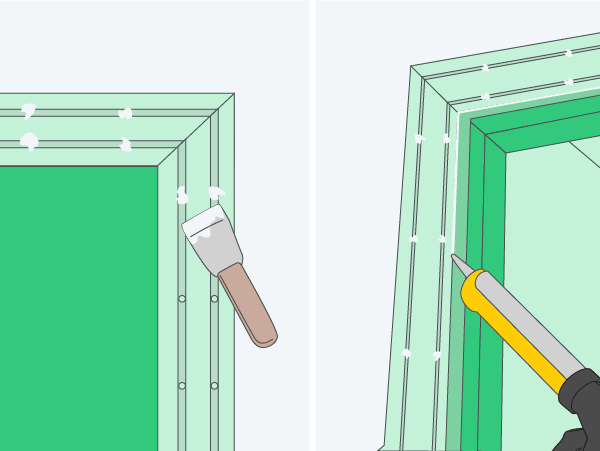
Once the cladding has been installed, you should seal all gaps with a sealant to keep moisture out and increase insulation.
Step 6: Install the door handle
The last thing to do is install the door handle and lock mechanism. Mark the door leaf as needed, then drill the holes for the handle and lock according to the hardware manufacturer's instructions.
Depending on the type of your new door, there might be some differences in how you install the hardware – all of which should be in the instructions for your particular model.
Replacing a frame, door, or panel is an involved job that requires precision, accuracy, and following instructions to get the best result.
Once you've finished, make sure everything is properly secured and that the door closes and opens smoothly.
The result should be both functional and aesthetically pleasing. You'll get a new functional part of your home or office, plus a fresh accent in the interior or exterior.